Building

Ghostbusters Project: Prepping the shell

So, a while back, I finally received my beautiful Nick-a-tron fiberglass proton pack hero kit.

At the core, the basic shell is what I’d use to work from, but even though it is amazing, there is still a lot of work to do on it!

First off, I drilled out part of the holes used for the lights in the cyclotron. (it is these holes here thad I already had done a quick drill through with my step drill.)

As you see, they are far from perfect, but I had planned to spend a little time with the shell and my trusty dremel!

Armed with a sanding drum, I went ahead and sanded those round.
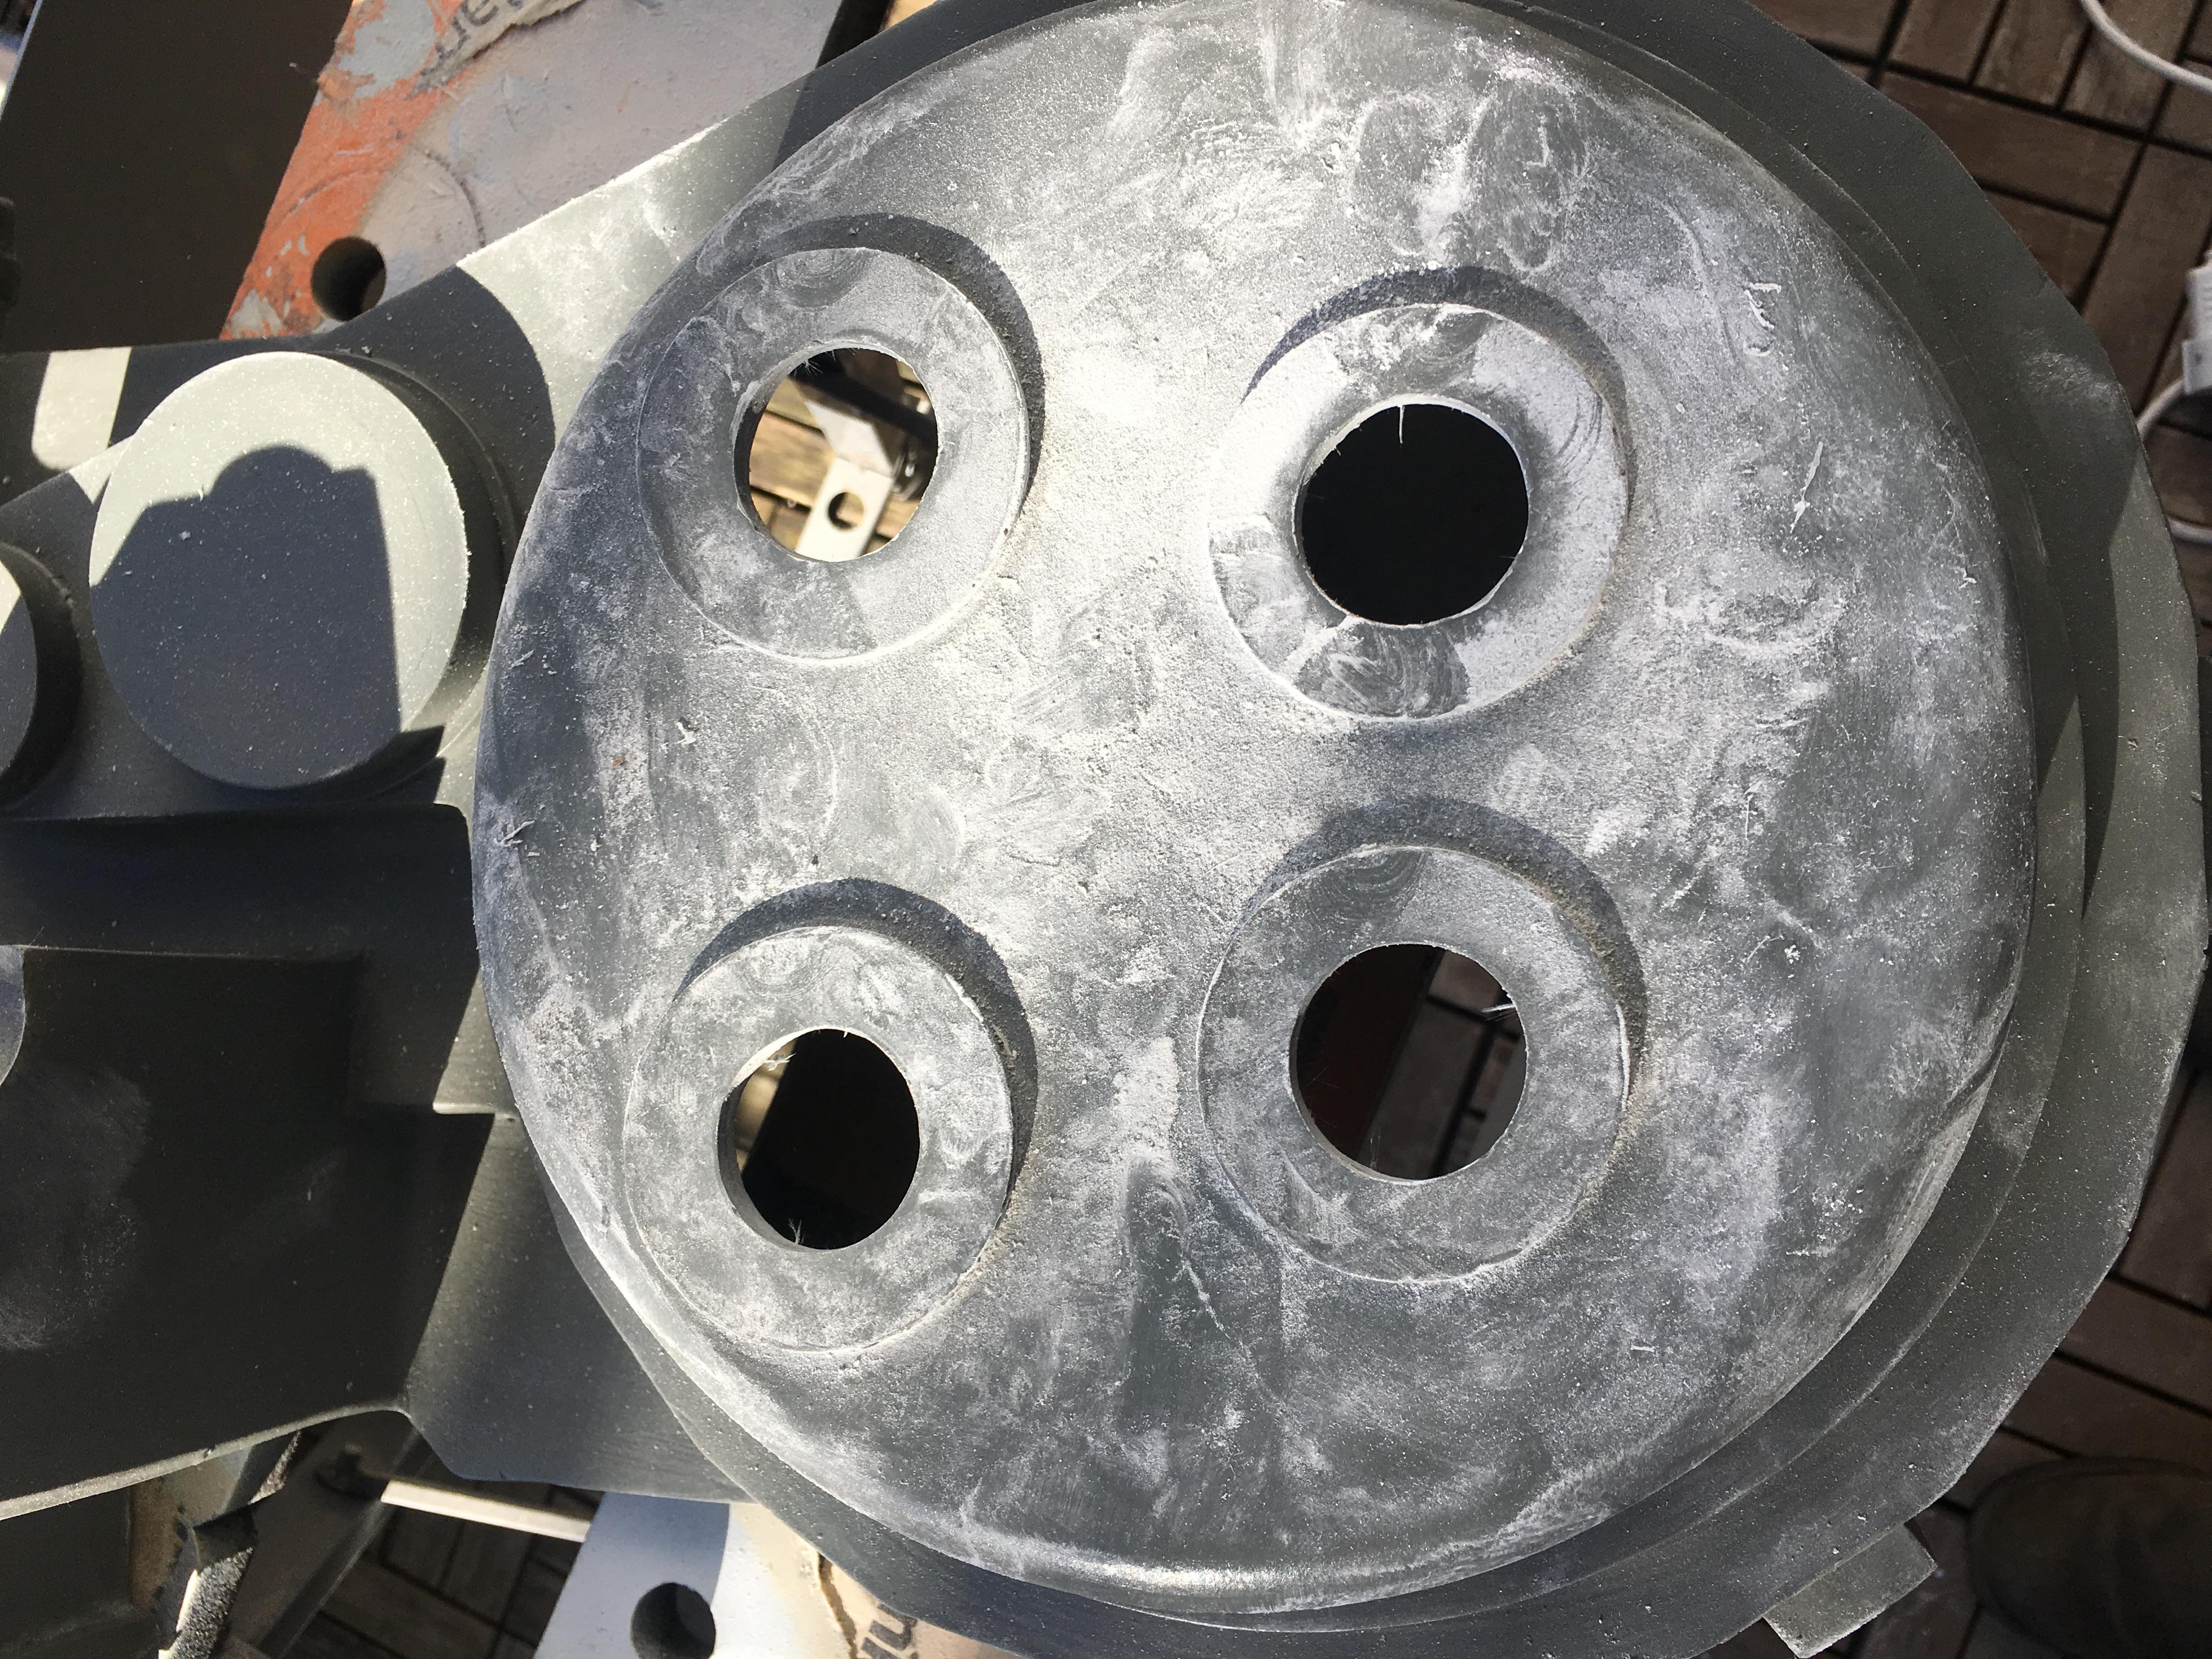
It is a pretty messy work, so it is definitely recommended to do this outside. Also recommended is to wear some sort of dust protector or rebreather. VERY recommended, in fact.

We had one of our first really sunny nice days outside in a long while, so it was perfect to spend a little time on the shell while my wife had a friend over and Emma played with her daughter in the mean time.

Once sanding was done, it was time to put on the cutting wheel and cut open the slot where the blue LED’s are going to be in the future. A steady hand and going slow made for a pretty decent result.

I also spent a little time removing some of the artefacts from the casting process to get my shell as good as can be. I will still need to bondo and sand parts of it more, but at least I have started.

During the evening, I also found a little time to plan for where I would place the N-filter… I think. I marked it out with a sharpie after gently scratching the outside of the N-filter into gel coat with a scalpel. If I end up moving it, a little bondo will cover these marks without issues before painting.

I also ended up making a holder for the split loom (the hose going to the gun portion) that is not exactly 100% screen accurate, but it will hold the loom in place wonderfully. I 3d printed this out of reinforced PLA. (Normal PLA would do, but I had reinforced PLA loaded, so it will be nice and sturdy.)

I designed this a while back before actually having the split loom in hand, so a few minor modifications was needed… and it ens up holding the loom perfectly.

My plan is to to put threaded brass inserts into the bottom portion, allowing me to use M3 bolts to hold it together and have no fatigue in the plastic.

More to come another day! 😀

By |2026-10-17T10:09:52+02:00March 20th, 2017|3D Printing, Building, Costuming, Ghostbusters, Ghostbusters Proton Pack|Comments Off on Ghostbusters Project: Prepping the shell

Ghostbusters Project: Modifying the Clippard

One of the features on both the proton pack and the thrower (the “gun” if you will) on the Ghostbusters costume from 1984, is a Clippard Valve. It is apparently used for something in the real world. In the Ghostbusters world, it is a thing that looks cool.

A while back, I 3d printed a copy of a clippard to keep on my proton pack to keep the weight down, and sitting right next to the real deal, it looks pretty good!

The twist knob still needs a little more work, but I’ve got a resin copy of that coming in, but what I’m devoting THIS post to, is modifying the original Clippard (The one that is supposed to go on the gun) to work as a volume controller for my proton pack.

After first opening the clippard and taking it apart, removing everything on the inside, I had to first saw off the round tab on the bottom  and drill a hole, allowing the cable to run through.

I also 3d designed a huge spacer/holder for the potentiometer that was to be placed inside the clippard.

I needed to cut down the pins on the potentiometer in order to make it fit properly, and once it was cut down and the wires were soldered, this what I was left with.

In the picture you can also see a spacer that I threaded and had screwed in place, and blue painters tape on the threads and rotary part of the potentiometer. You’ll see why shortly…

To make sure I had enough room for the solder joints, I drilled out the top of the inside of the Clippard with a stepper drill, just to give some more space. The enclosure will be held in place 6 mm further down where the inside diameter will match the 3d printed enclosure perfectly.

The potentiometer fit like a glove into my 3d printed enclosure.

Pushed down into the Clippard with the cable going out through the hole I drilled in the bottom:

When I started to put the clippard together, the thin axel of the potentiometer didn’t exactly look like the original… so I had to do something here. I took the original threaded part that was hooked up to the clippard and the rotary knob, and put it in my power drill with a metal blade to cut off a small piece.

It was still larger than the potentiometer on the inside, so a few turns with painters tape was just right to center the brass bit.

Finally, attaching the knob at the top again, and I now have a potentiometer for the volume built into my Thrower Clippard!

Can’t wait to actually fit this on my pack in the (hopefully) near future.

By |2017-03-27T00:17:37+02:00January 5th, 2017|3D Printing, Building, Costuming, Ghostbusters, Ghostbusters Proton Pack|Comments Off on Ghostbusters Project: Modifying the Clippard

My 3 year old has a brain tumour. #goEmma

Please read this one through. This is important.

emma_r2

I recently wrote a long post about when I took my R2 to visit a little kid with cancer in Uppsala. A brave little trooper that bombarded us with trivia and questions in spite of his illness.

Little did I know disaster would strike my own life precisely 4 weeks later.

On Thursday, June 16th, we took our daughter to the emergency room. She had not been behaving what we thought was normal for a little while, and grew tired of waiting for the referral from our local physician.

On June 21st, our lives came crashing down. Emma, our beloved 3 year old, has been diagnosed with a malignant brain tumour.

She turned 3 on June 13th, so literally the worst gift any child could receive for their third birthday.

Her tumour is unusually large. She was likely born with it and it has grown slowly over the years. That is the only reason it can be so large and she has not had any symptoms until recently.

Her cancer is inoperable. It is too big, and located so centrally in her brain that it can not be removed through surgical means.
Our only home is chemotherapy which will commence as soon as the results form her biopsy comes in.

Naturally, our lives are wrecked. It is a disaster. We are living in a nightmare.

I don’t know yet what it all entails, it is too early, but we do know that we need to prepare for a LONG fight.

Currently, None of us are working. We are both on sick leave to help Emma as best as we can.

Marta (my fiancée) will not work until Emma is well again. That can mean up to two years.
I might return to work after summer. We don’t know. It all depends on the treatments.

I might need to sell my R2. I don’t know yet. If anyone would be willing to buy him, he looks amazing.

If you have read this build blog in the past and have enjoyed it, you can help us.

Please share this link within your network, and should you have the possibility to help out, it is much appreciated.

https://www.youcaring.com/micke-askernas-590891

emma_bb

Emma is so brave and strong. She is stronger than all of us, I think. She is a little tired after all the tests and the seizures she’s had, but once she is well rested she is so happy. She just doesn’t have the stamina to do much. Yet.

#goEmma

By |2016-12-05T23:59:59+01:00June 25th, 2016|BB-8, R2-D2|Comments Off on My 3 year old has a brain tumour. #goEmma
Go to Top