dome

BB8 Dome nearing completion

I hurried putting my dome for BB-8 together for the Sci Fi convention in mid September. This included doing a quick (and not nearly good enough) paint job to just get the dome to some sort of colour.

IMG_8519 IMG_8528

The paint was too thick in places, and I had not had enough time to do a proper job concealing the joints. You can really see the joint on the left hand side of the picture quite clearly.

I also had no time to really let the paint dry before I hit it with the clear coat, so it all sort of blended together. Not to mention the ugly skirt..

To fix the skirt and the dome ring, I needed to print new parts, something I have done and are still in the process of assembling.

Paint job being botched (and no orange) aside, it still looked pretty cool!

IMG_8538

Not to mention the extreme close-up .. 2001 warning ahead:

IMG_8540

This got me through the Sci Fi convention, even though it was just a base.

Being back home, I sanded the clear coat and most of the paint off, worked over some of the problem areas with some putty filler, sanded again, and then applied 3 coats of spray filler, before sanding it down AGAIN with 400 grit sand paper to a very smooth finish, before I applied the white paint again. No more problem areas, and no more visible joints!

IMG_9098

Once the dome was white (again) and the paint had cured, I taped over the entire dome, and cut out the portions that was going to be orange, and then hit the dome with the brand new orange paint I had custom ordered.

Once cured, the dome looks GREAT!

IMG_9113

After the paint had cured properly, it was time to hit it with the clear coat.

IMG_9115 IMG_9116 IMG_9118

The dome feels incredibly smooth.

Time to buy a can of dark grey and tint the Radar Surrounds and the Holo Projector (and the Holo Projector ring) in the proper colour and mount them.

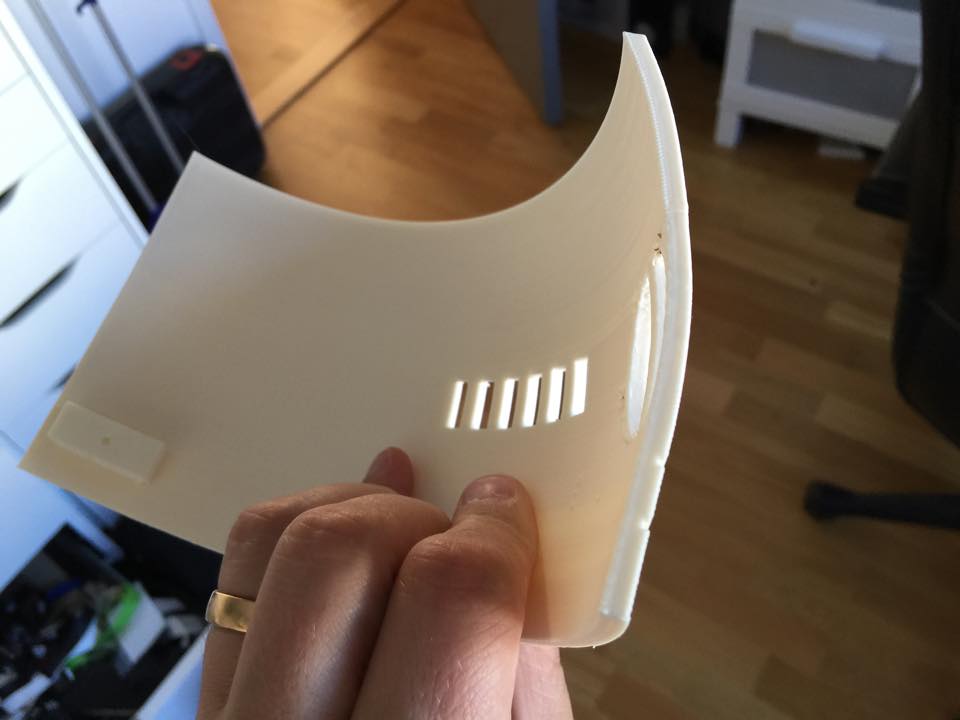
The only annoying thing is that I had made a really good PSI that should sit in the smaller hole on this picture, however, when cleaning out my workshop the other day, I suspect that small PSI that I wrote a nice blog post about, accidentally found its way out in the trash…

IMG_9081

Ah well, you gain some, you lose some. I have updated the 3D model for this, so next time it should be a lot easier for me to get what I need to get done!

Next up is putting some more focus on the dome ring and dome skirt so I can paint and mount them for a finalized dome structure. Can’t wait to get this part of the build done so I can start weathering the dome, I’m really looking forward to that!

By |2016-12-06T00:00:03+01:00October 7th, 2015|BB-8, Building|Comments Off on BB8 Dome nearing completion

BB-8 Progress

Last time I left you hanging right after I’ve sanded and added Tamaiya Putty to my dome.

After I got back from a bit of well deserved vacation, it was time to (in very little time) try and get this as finished as I could in just a day to exhibit on the upcoming Science Fiction convention in Uppsala here in Sweden.

While being away on vacation, I got a nice package from my friend Michael Erwin in the US, who sent me a custom made lens for the holo projector for BB-8.

This.. looks MUCH better!

IMG_8514


A little bit of sanding and just a touch of glue to keep it in place for now, and this part is done! I still need to find a good dark grey paint and change the main colour, but the part itself is done!

Next up was the dome. I knew I still had a few small blemishes here and there, and the joint between the dome thirds is not 100%, but I wanted to show something BB-8-ish at the convention, so off to the back yard and start painting!

IMG_8518

A bit of filler primer, and it looks a lot smoother all of a sudden.

Normally this is where I would wait for this to cure properly and then sand it down to basically nothing, but no time to waste!

As soon as the surface was dry, It was time to hit it with my Satin White!

IMG_8519

Not having enough time to wait for the paint to cure properly, next up was clear coating. Naturally I ended up with a little too much and it got a little runny in one spot. Fortunately, I managed to fix this pretty well, but even so, I am still going to sand this dome after a bit of putty on a few places, and then repaint it.

Next up was the Radar Eye.

IMG_8522

It does have a bit of texture from the print still, and I could fix this with a bit of filler primer, but to be honest, I like the extra texture. It gives a bit of depth to the overall look.

Even though I printed the Radar Eye insert at 0.05 mm layer height, and no sanding was done, as it looked just perfect in black ABS, I did still cover it with a thin coat of black paint, and subsequent clear coat.

IMG_8520

It just looks better and better. Can’t wait to put this all together!

Waiting for the pieces to dry, it was time to focus on other tasks. Making a lens for the PSI is one of those things.

The PSI lens should be small and round and sort of see thru, but milky white. A bit of clear acrylic will have to do!

IMG_8525

Away with the covering plastic and start cutting out the circle.

IMG_8526

Basically I cut a basic circle with my cutters. This was neither round nor pretty, but some thick sand paper and some patience solved this nicely.

Once sanded, I brought out some 600 grit sand paper and sanded the fronts and backs of the lens as well to give it a nice, milky, see through look.

IMG_8524

Yes, it was really a rough sort of roundish piece that has been sanded by hand to this shape. Honestly!

Time to do the Radar Eye lens!

Having ordered a couple clear acrylic 70 mm hemispheres (to allow for failure), I set up a blade from a break blade knife on a small pad of paper and clamped it all down real good. I then pushed the hemisphere down and against the blade white rotating it as I went along.

After the first attempt I found the proper height from the pad, and did it all over again, a bit more careful this time as well.

IMG_8544

Once I had cut through, I sanded off any rough edges through sanding on a flat sandpaper that was on my desk.

IMG_8545

Next up: I had a couple of red LED’s lying at home, and I carefully pushed them into the small portion of the Radar Eye insert, and put shrink hose on the legs and routed the legs through the Radar Eye housing.

A small 3 volt battery hooked up (actually, taped) to the LED and it gives us … this!

IMG_8540

It really gives a 2001 vibe, doesn’t it ?

I’m sorry Dave. I can’t do that…

Time to put it all together…

PSI insert was treated with a bit of silver rub and buff (after looking at pictures since, I realize this was a mistake, but I will fix that when things calm down a bit..

The Radar Eye was pushed in to the opening, same with the holo projector.

I actually glued the housing of a LED flash light on the back, so all I need to do in order to get it to lit up, is solder a few cables and attach a battery!

No time to fix the dome ring or the dome skirt for now. They area bit crooked, but I will print them over again at a later point.

Anyway, this is the result. Starting to really look as it should!

IMG_8530IMG_8528

IMG_8538


By |2016-12-06T00:00:06+01:00September 13th, 2015|BB-8|Comments Off on BB-8 Progress

Mini update!

My original plan was to do a 40% scale version of my R2.

Well .. This plan has changed. The new plan is to make a 50% scale version of R2-D2.

Why the new format, you may ask? –Well, the slightly larger scale makes the details really pop out from the printer.

I can’t print the entire dome in one go, but I might as well split it in several parts. The first proper dome print was splitting the dome in half, and printing it in halves. It came out really well.

IMG_7049

It is quite thin at this point, but once ready, the parts really look good.

IMG_7059

It also means I need to print a complete new set of greeblies for the dome, and of course, the old 40% leg struts and parts done, needs to be remade as well.

IMG_7010 IMG_6995

I just think this is so cute.. 😉

The second dome I made much thicker, and split in 4 parts. The main dome is in thirds, but I also cut off the top to print as one single part as well.

Much sturdier…

ThickerDome2 ThickerDome1


However, still fragile..

IMG_7482

Fortunately, this is an easy fix, and once I have acetone coated the insides, it should be sturdy and have no issues at all.


By |2016-12-06T00:00:17+01:00August 24th, 2015|Mini-R2|Comments Off on Mini update!
Go to Top