Since the dawn of time… well.. since R2 was finished originally, that is, he’s had a pair of heavy resin bulks under the Ankle Cylinders.
The Ankle Cylinders was scratch built 3 years ago, and was basically a piece of PVC pipe with thin strips of styrene wrapped around it, with custom made end caps.
See this post for the original build: Scratch building ankle cylinders! They have done the trick up until now, but I wanted to have a set that looked a bit better.
The main reason for revisiting this, is that the original pieces have only been taped to the ankle with double stick tape that has (mostly) done the job, but they have had a tendency to fall off.
I don’t want to glue things in place here, as if I need to do any work on the cables inside, I need to be able to remove these to get to an access hole that is hiding behind them.
I had also lost a few of the ankle wedges (see Building an ankle wedge) that is supposed to sit on top of the cylinders. They were also just taped to the ankle…
The total assembly looked like this: 
But now it was time to fix everything in this area. I had not been 100% happy with the aluminium tape wrapped around the pipe, even if it has done the job.
So, armed with my trusty CAD program, the avid reader know that I have been printing Ankle Cylinders in the past.
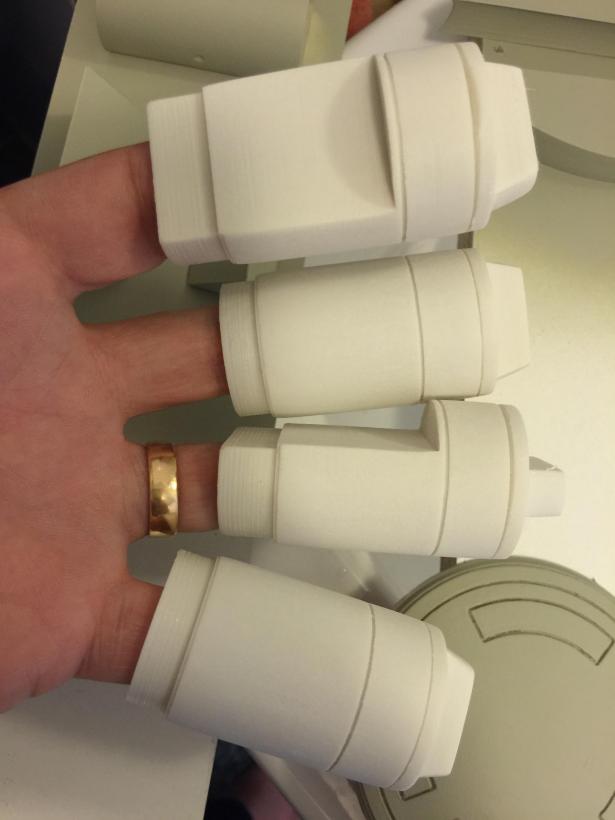
This is the parts that I drew and printed:
These were printed apart to get the grooves in the cylinder as sharp as possible.
The new ankle cylinders holders. 3D printed, hollow and extremely light. I have glued 12mm magnets inside them for holding them to the ankle later on.
Here are the new wedges. They are a lot sturdier and better than my old ones! These ones also has magnets inside them. The idea is to pin the wedge inbetween them.
Like this.
Since I can disassemble these, it makes for easy painting.
End pieces sanded and ready for painting!
I started off by painting them with a filler primer. I chose this as it fills up any imperfections after not sanding enough, or print imperfections.
A dab of the old “Satin White” ..
… and some R2 Blue…
… add a little rub and buff …
… and the assembly should be ready for mounting on the droid.
I must say I am very happy with the results. The rub and buff really looks like metal!
Next up, fixing the magnets to the droid..
All in all, a great upgrade. Next up is adding the new Ankle Details in aluminium and then weather the new pieces on the ankle.
Finale assembly:


